Attaching, Deleting, and Viewing Supporting Documents
Overview
Supporting documents can be attached to working versions to provide
reasons for allocations and budget decisions. For example, attach SOPPS
Biennial Payroll Projection worksheets to show the OBM
Budget Analyst how the agency came up with the payroll request
for each planning center.
In OAKS, files can be attached to a version of a planning center scenario/activity.
Other Preparers and Reviewers
who have access to this planning center can see all attachments and open
them from the Attachments link
on the Line Item Details page.
These file types can be attached:
- MS Word (.doc and .docx files)
- MS Excel (.xls and .xlsx files)
- Text (.txt files)
- Adobe (.PDF files)
Supporting documents can be attached to any version of a scenario/activity
for a planning center.
- BPM allows any file type
to be uploaded.
- OBM recommends that executable files (those files ending in .exe)
and databases NOT be uploaded due to the potential for malicious software
in these file types.
- Please note that the State's IT policies apply to all files uploaded
to BPM.
Size Limitations
OAKS BPM recommends that file uploads be limited to a maximum of:
- Single File: 10MB (zip larger files before attaching)
- Total Agency: 500MB
When an Attachments Exist link
is displayed on the Line Item Details
page, it can be used to open attachments for that budget version.
Remember to click the Save button
on the Line Item Detail page to
finalize a file attachment.
You must have Budget Line Item Details.
General Recommendation
Only attach files that the Agency Reviewer or OBM Budget Analyst may
use when reviewing and trying to understand how the budget amount was
calculated. If a file is larger than 10MB, be sure to compress it.
Suggested Budget Attachments
- Spreadsheets
- Payroll projections
- Assumptions
- Historical figures
- Usage documentation
- Grant Information
Attachments to Avoid
- Strategic Plans: instead provide a link if the attachment is online.
- Personnel Files: these files are likely subject to Ohio's Open
Records laws. Use discretion if attaching these files.
- Extremely Large Files
- Undocumented Files: Must include author, date uploaded and location
on the agency network.
- Out-of-Date Files
Steps
- Planning and Budgeting > Activity Preparation
> My Planning Workspace
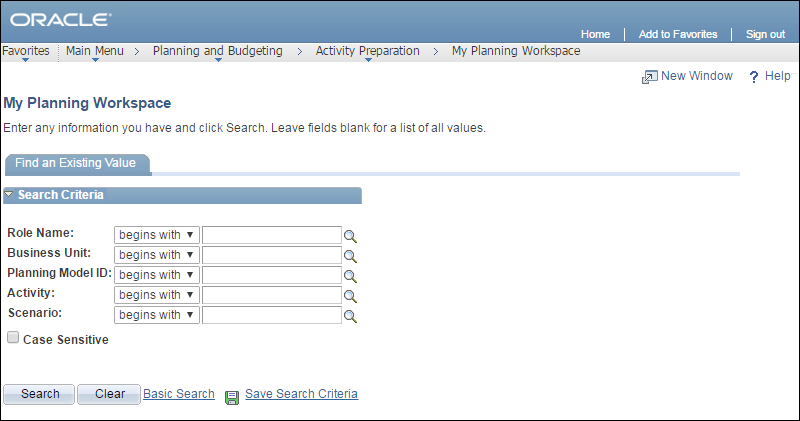
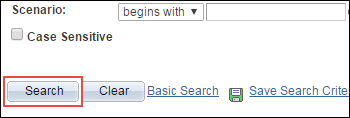
- Enter or select Preparer
in the Role
Name

 field.
- Click Search.
- A list of all models available to someone with the specified role
displays.
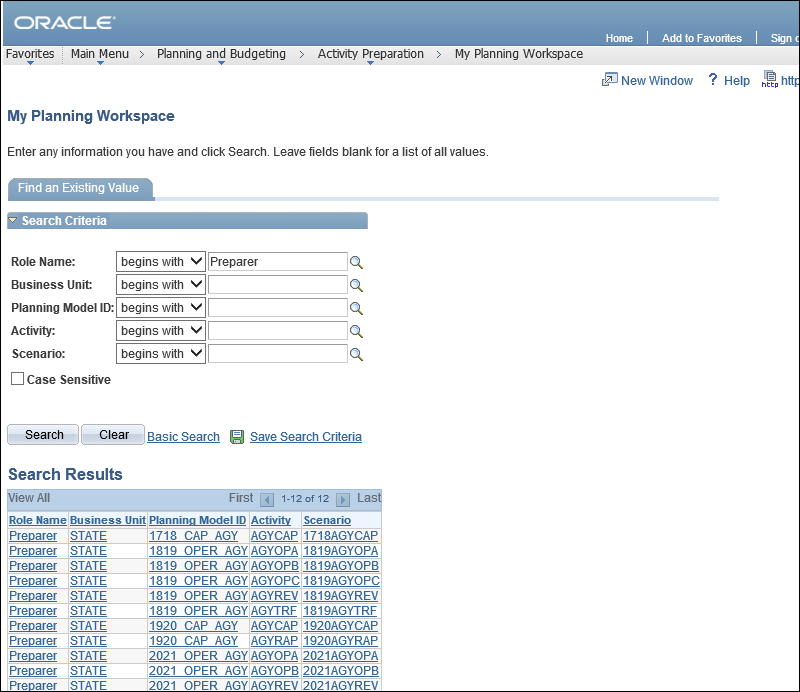
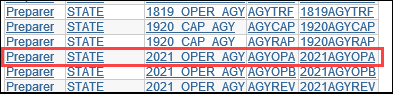
- Click the Scenario
that has a version to which line items (ChartField Strings) need to
be added.
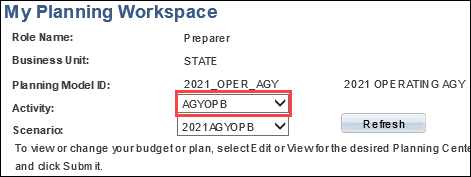
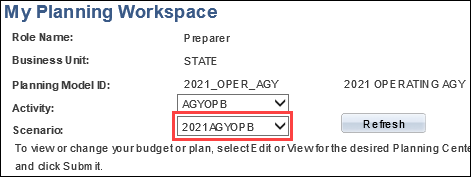
- The My Planning Workspace page
displays the planning center budgets for that model.
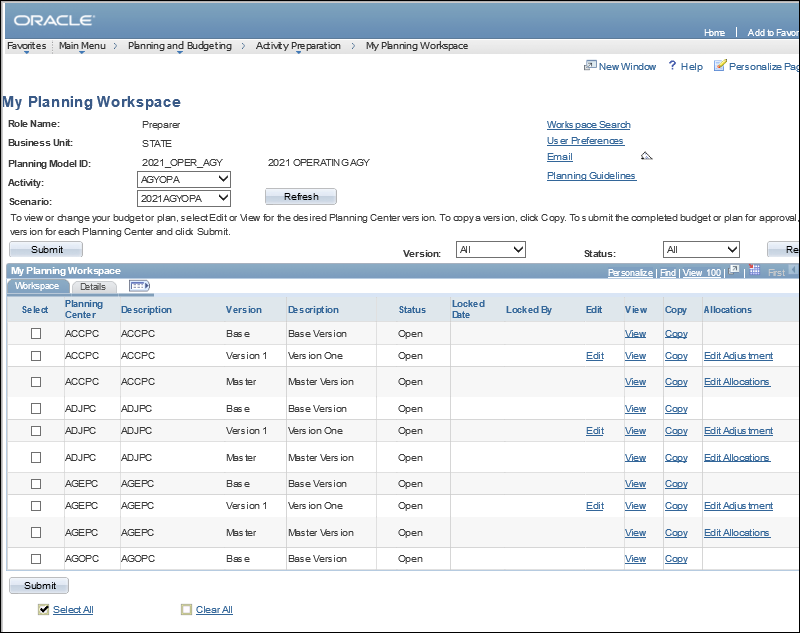
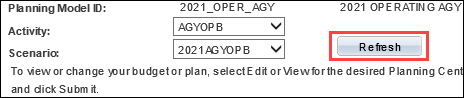
- Click the appropriate budget option in the Activity
dropdown list.
- Select the appropriate option in the Scenario
dropdown list.
- Click Refresh.
- The Workspace table
updates to display versions for the selected Scenario.
- This page can be accessed by another
link once inside the application; one of the possibilities is
by clicking the My Workspace
link.
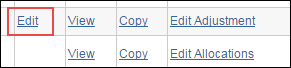
- Click the Edit
link for the version to which an attachment should be added to a line
item (ChartField string).
- The Line Item Details page
displays.
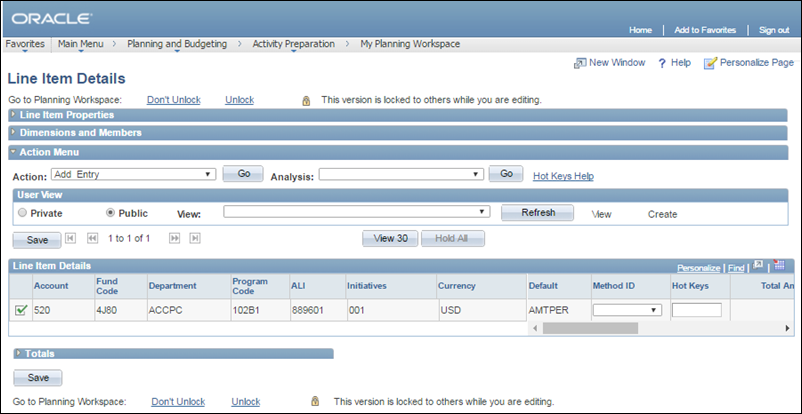
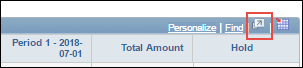
- Click the Zoom
icon next to the Find
link to the far right of the screen.
- The Line Item, Main Page
window will display.

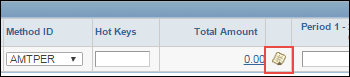
- Click the Note
icon for the version to which a document should be attached.
- The Line Item Notes page
displays.
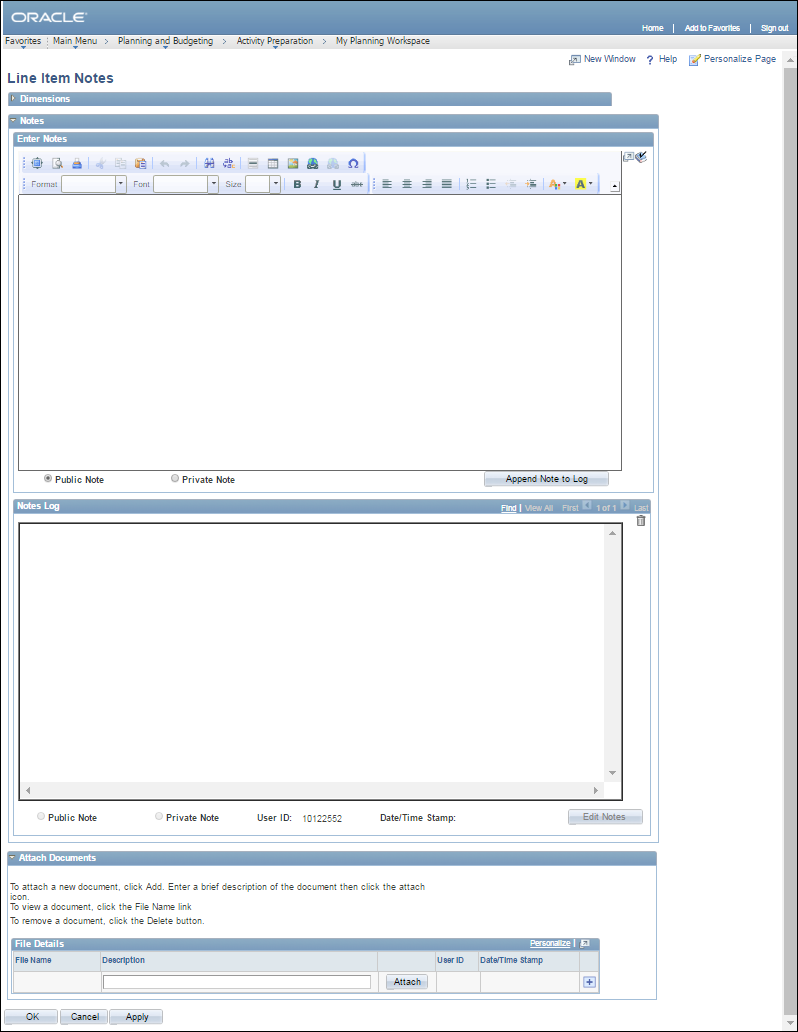
- Scroll to the bottom of the Line
Item Notes page to the Attach
Documents section
- If files have already been attached, a line
item will display for each attached file. If an attachment already
exists, the link will read, “Attachments
Exist.”
- Enter a descriptive name for the document to be attached in the
Description
field.
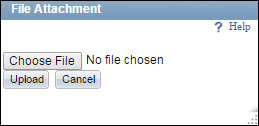
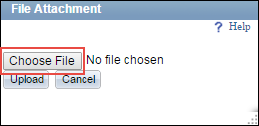
- Click Attach.
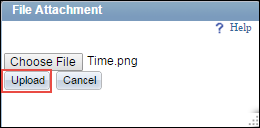
- Click Choose
File.
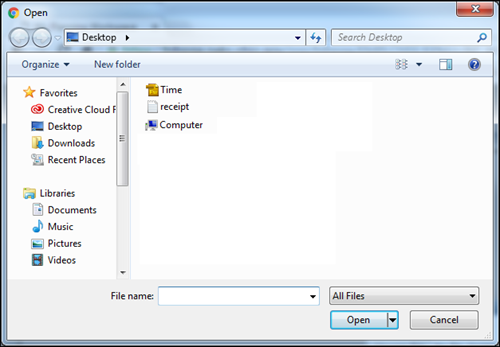
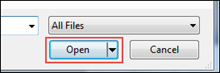
- Navigate to and select the desired file, then click Open.
- The full path for the selected file displays
in the text field.
- Click Upload.
- The Attach
Documents page displays. There is now a link with the file
name to the left of the Description
field, and the User ID and
Date/Time Stamp fields are
populated.

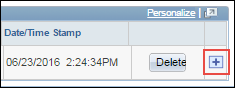
- Click the Add
a new row icon to add another attachment.
- Perform the steps above to attach another document.
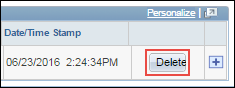
- Click the Delete
button to delete an attachment.
- Click OK
when you have added, deleted or viewed an attachment on the
Attach Budget Documents page.
- The Line
Item Details page displays.