Revised: 09/15/2022
ORC Section 126: OFFICE OF BUDGET AND MANAGEMENT
OAKS FIN provides customer statements containing all items open as of a specified date. Customers can request these statements or they can be used within an agency to resolve account discrepancies.
The statement lists all open items, including credit and debit memos, for the customer. The balance shown is the total balance, with subtotals for the standard aging categories.
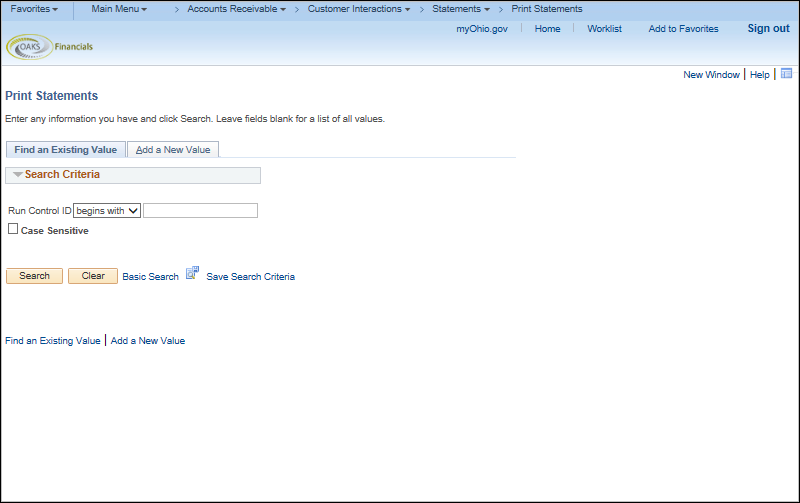
Statement runs are controlled by a Run Control ID. When running a report, either create a run control ID or look up an existing run control ID. To reduce impact on the servers, it is recommended that a single run control ID be created to reuse each time that report is run, changing the parameters as necessary. The combination of the Run Control ID and the User ID uniquely identifies the user’s preferences for running a report or process in OAKS FIN, and when searching, the user sees only his or her own Run Control ID (s).

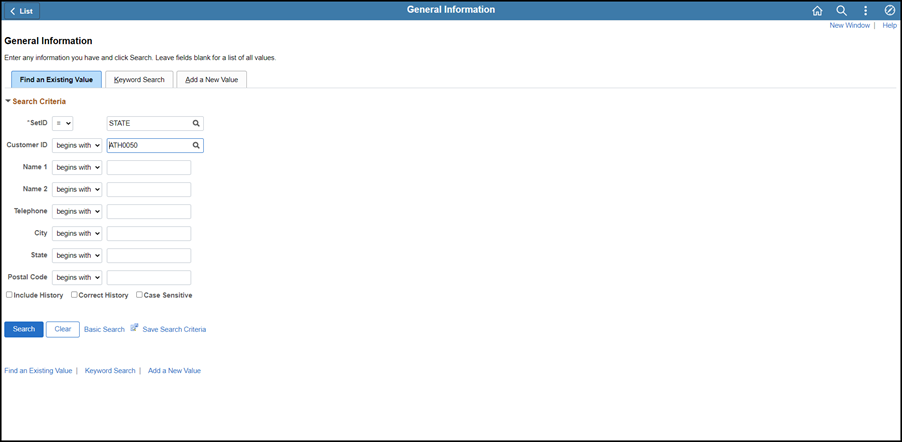
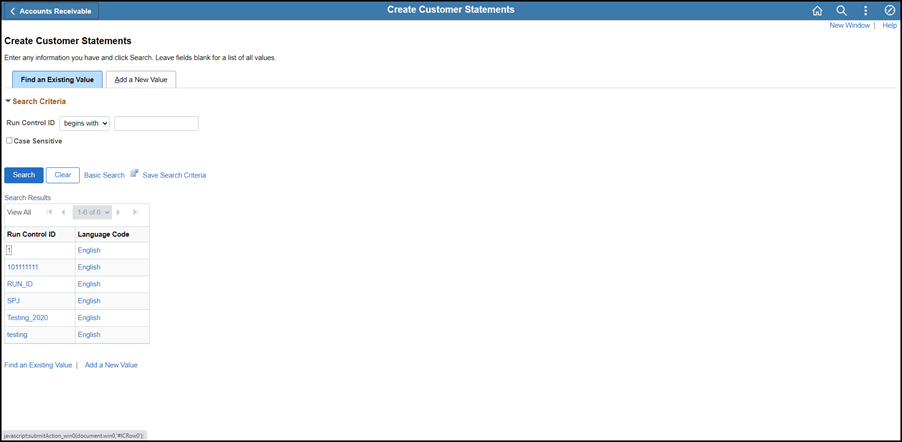
Click the Find an Existing Value tab to search for and select an existing Run Control ID.
Or, click the Add New Value tab to create a new Run Control ID.
Enter a descriptive name consisting of up to 30 alphanumeric characters, with no spaces, in the Run Control ID field.
Click Add.
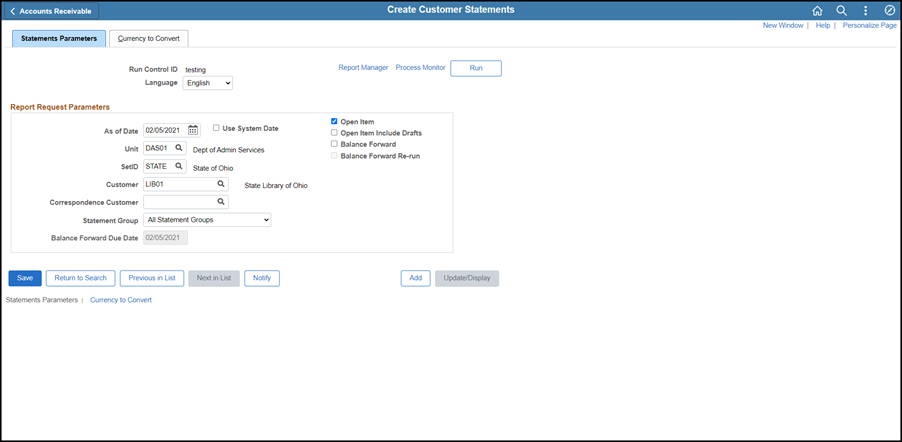
Click Run.
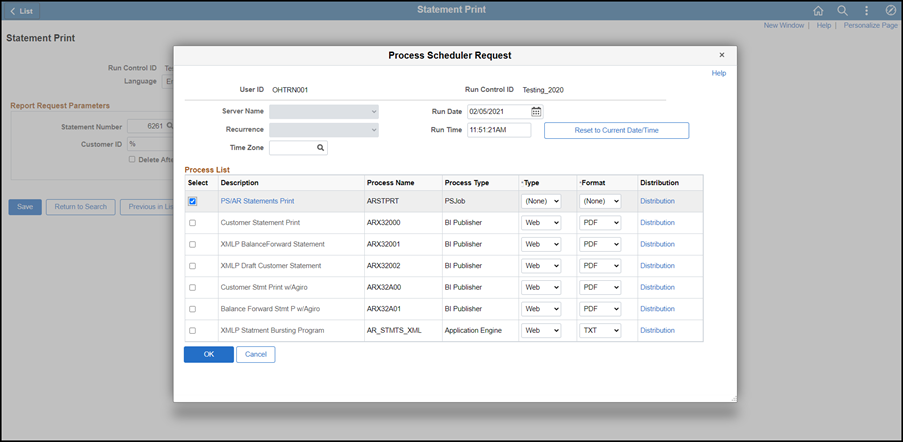
The Process Scheduler Request page displays.
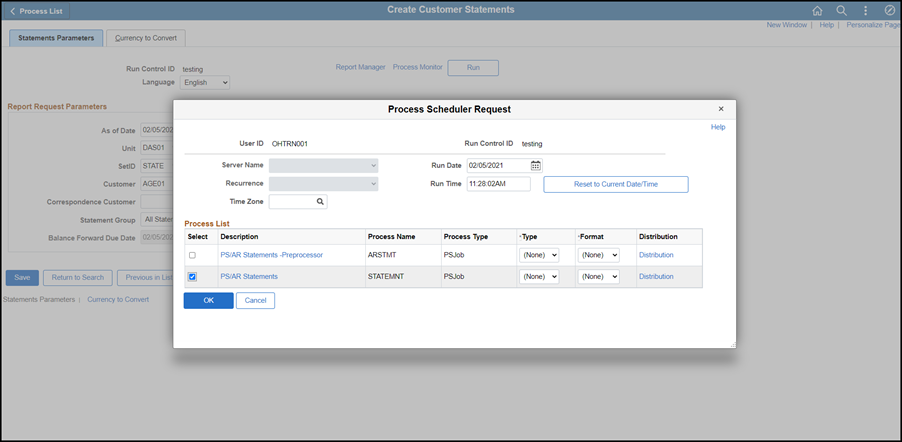
Do not change entries for Server Name, Recurrence, Run Date, or Run Time fields. Use the default settings for immediate processing.
Click the PS/AR Statements checkbox.at the left of the row in which the Process Type is PSJob.
The first process extracts data for the statements, while the second (PSJob) is a combined operation that runs all necessary processes in sequence to produce printable statements.
Click OK.
OAKS FIN assigns a Process Instance number when a process is run. Use this to track the status of the run.
Click the Process Monitor link to review the status of the run request.
The Process List page displays.
Click Refresh periodically, until Run Status displays Success, and Distribution Status displays Posted for the STATEMNT job.
“Success” means that OAKS FIN has finished processing and the job ran successfully. “Posted” means OAKS FIN has successfully created the statement.
Click the Process Name, "STATEMNT" link.
The Process Detail page displays.
Click on the AR_STMT Success link dropdown to retrieve the statement number.
Click on the AR_STMT1 Success link.
The Process Detail page displays.

The Process List page displays.
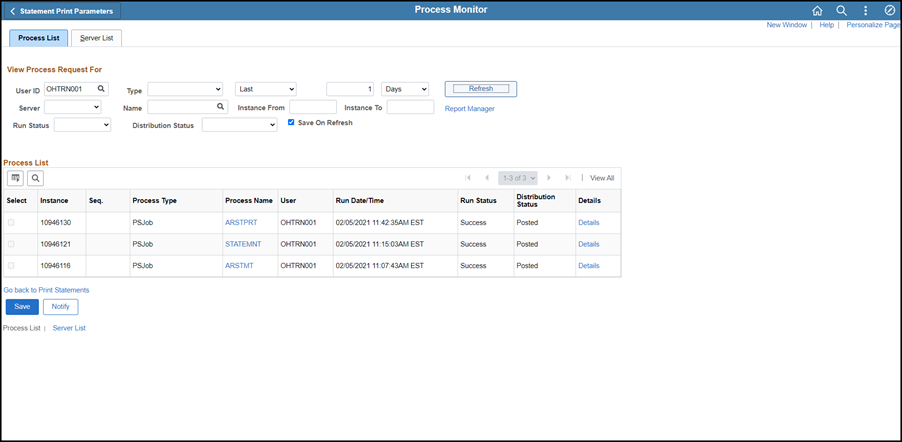
Click Refresh periodically, until Run Status displays Success, and Distribution Status displays Posted for the ARSTPRT job.
“Success” means that OAKS FIN has finished processing and the job ran successfully. “Posted” means OAKS FIN has successfully created the statement.
Click Go back to Print Statements link.

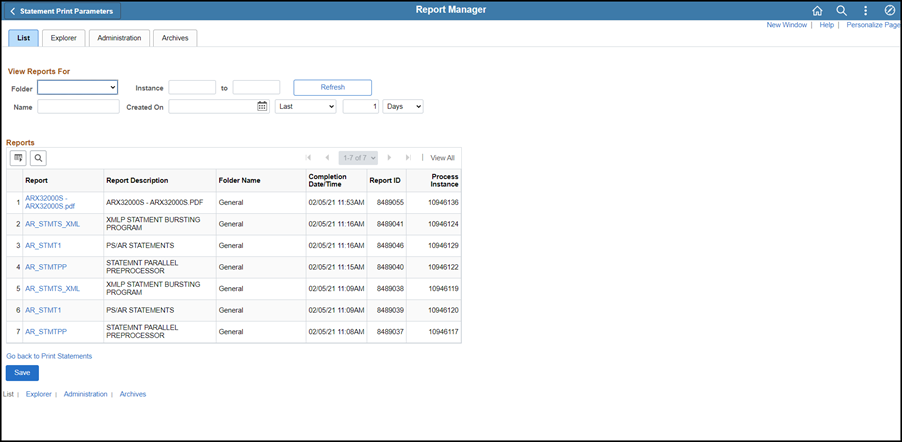
The statement displays.
